

Thursday 29 September 2011
Cygnar Storm Blades
Wednesday 28 September 2011
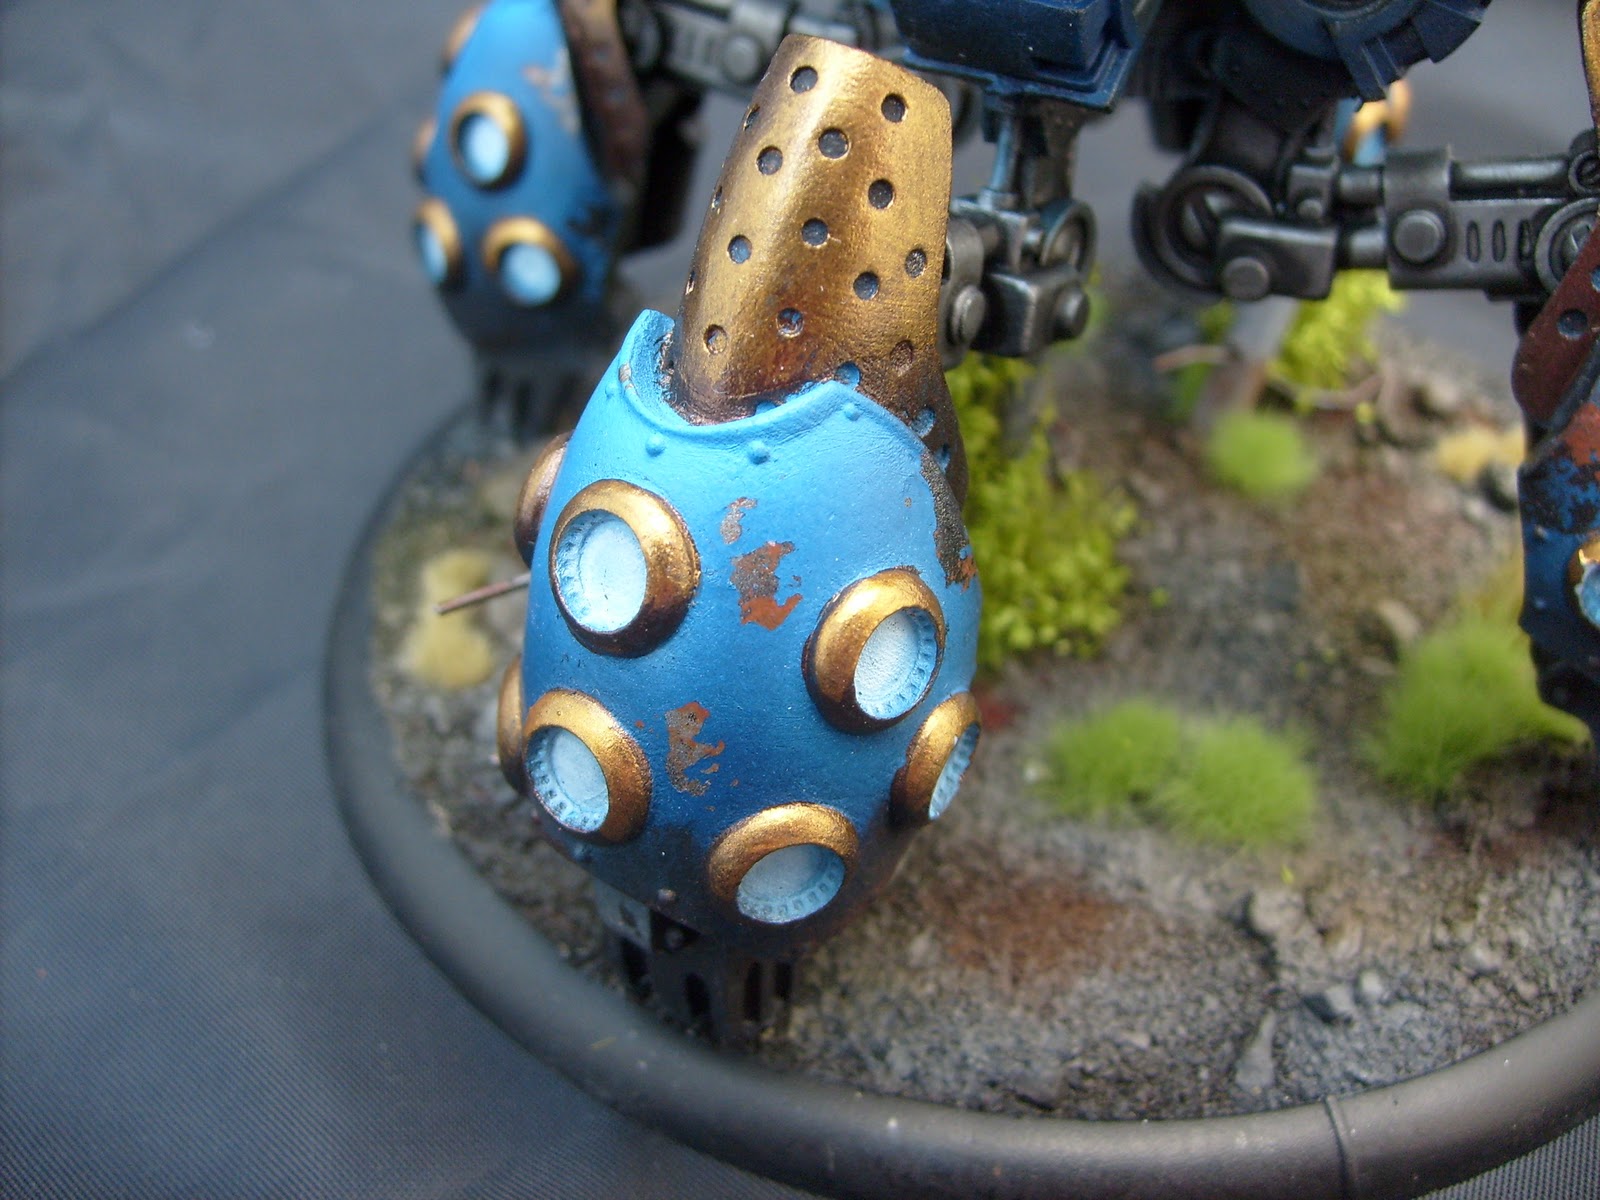
Cryx Battle Box

I've done up a small Cryx force just for something fun to paint. I really wanted to show how making your own custom bases for your army can really bring a lot of character and variety to your force. As you can see I've done raised platform style bases for all the Cryx models here.


Finally we come to Denegra. The Cryx battle box Denegra comes with a pretty set pose. Fortunately it is really cool. Again going with the raised platform I decided to add some 'scenery' to the base. With the 'tree' in the back round it creates a much greater visual effect than simply having Denegra stand there. Note the directional correlation between her spear and the angle of the branches. Again small things really help bring a model to life and something as simple as putting a stick onto a base has certainly achieved that in this case.
Well that's all for this 'unboxing' of the Cryx Battle Box I guess you could call it. As the force gets painted there will be updates you can be sure.
And remember if you like what you see or if you have any questions or comments just leave a message in the comm box below.
Tuesday 27 September 2011
Irresistible Force Warmachine League: Week 2
Well after a bit of chopping and changing, then some shuffling, and re-organisation I finally got my round 2 games in for the Irresistible Force Warmachine League. My first opponent was a sir Jed Dwyer. A shifty little Skorne player who after about 10 turns I was able to finally win on caster kill...(stupid skorne) I was playing eHaley's new tier 4 list 'Stormbringers' only because I've heard quite a bit of whinging about it so far from people I though why not crack this puppy out and give her a go. Here's some photo's of the first couple of turns.


My second opponent was one Eddie Cooper. Having deftly lulled me into a false sense of security by telling me that he knew nothing of Legion of the Everblight. He proceded to trounce me primarily by smashing Absylonia into oblivion with is Gorton Basher...I've really got to get a grip when it comes to playing my Legion. They are the faction that I'm least experienced with and it definitely shows. Perhaps running a more versatile list next time will help. Only time will tell. Here's a couple of photo's from that game.


My second opponent was one Eddie Cooper. Having deftly lulled me into a false sense of security by telling me that he knew nothing of Legion of the Everblight. He proceded to trounce me primarily by smashing Absylonia into oblivion with is Gorton Basher...I've really got to get a grip when it comes to playing my Legion. They are the faction that I'm least experienced with and it definitely shows. Perhaps running a more versatile list next time will help. Only time will tell. Here's a couple of photo's from that game.


Monday 26 September 2011
Chaos Manticore - Complete
So the Chaos Manitcore that I've been painting for a client is finally complete. There is a major emphasis on the wings and the rider which really draws the attention of the eye. While the sculpt may not be the most fantastic according to a lot of people. I really think Games Workshop did a fantastic job on the riders. I found the level of detail to be superb and the big areas to really give some character were fantastic - see the sorcerers cape-
All round I really like the Chaos Manitcore and found it a pleasure to paint. My client loves the pictures they've seen so far and I hope you enjoy them as well. When you're done reading and looking be sure to leave a comment. I love hearing from people and getting feedback.


All round I really like the Chaos Manitcore and found it a pleasure to paint. My client loves the pictures they've seen so far and I hope you enjoy them as well. When you're done reading and looking be sure to leave a comment. I love hearing from people and getting feedback.


Saturday 24 September 2011
Madelyn Corbeu -The Lady
From time to time I don't really have much to write. I just have miniatures to show you. This is one of those times. Just enjoy the lady.


This was only a quick paint job for play on the table top. None the less I think it turned out quite nice.


This was only a quick paint job for play on the table top. None the less I think it turned out quite nice.
Wednesday 21 September 2011
Talkin Tools

I'd like to take a moment to introduce to you a new series that I'll be doing on a semi regular basis. It's called 'Talkin Tools' and even though initially you may have thought it was going to be a discussion based around 'that guy' at your local gaming club it's actually going to be talking about the various tools used in my profession as a miniature artist.
For the first cab off the rank I'll be giving a general 'tool box' overview. This is a list of items that I believe are the 'basics' for any hobbyist or amateur modeler. These are tools that I use every day-
Stanley Knife - When I say stanley knife most people will probably know this as an exacto blade or hobby knife etc etc...what I'm referring to is a hand held cutter with replaceable blades. I prefer not to use knifes with snap off blade edges as sometimes they will just 'snap off' when you're trying to do something important. As well they tend to be more flimsy and harder to work with. If you're going to get a good Stanley knife go to your local hardware store and get a decent one with some spare blades. I've been using mine for 3 years now and still haven't worked my way through the blades that came with the original knife...well worth a $12-13 investment in my opinion.
Super Glue - This is such a staple that I almost completely forgot about it to be honest. I assumed that most people would already have this in their kit but I'll make mention of a couple of points. Make sure you always have plenty on hand. There is nothing worse than getting 90% through a project and running out of super glue. As far as brand goes I'm not that fussy. Some people insist on certain brands but I always seem to get away with going to a discount store (crazy clarks, sam's warehouse, fair dinkum bargains) and picking up 3-4 packets of super glue at a time for $2-3 a pop. Very simple, very straight forward.
Clippers - I used to do everything with a stanley knife with mixed results. That includes getting parts off sprues. Looking back I don't know what I was thinking or how many models I actually damaged in the process. But let me just say in case you are tempted to be cheap like I was. GET SOME CLIPPERS. A simple $5 pair of wire clippers from a hardware store will save you a world of grief in the long run. While both clippers and knifes cut they serve two very different purposes.
Paint brushes - Starting out in the game I bought cheap brushes. And they did me fine. If all you are looking to achieve is something to put on the table top then I would recommend going down to a local spotlight store and picking up some cheap $3-4 brushes. Pick up a few because you'll need a few as they tend to hook, split and generally get crappy real quick. These are perfectly fine for the basic paintjob. Make sure you're either getting synthetic or red sable bristles. These will keep you in good stead for miniatures and make sure you steer well away from hog bristles. I thought the point was self evident but I thought I'd just make a point of it since some people need to have it spelled out.
If however you are looking for a better quality, long lasting brush then I would point you in the direction of brands such as Windsor Newton and Raphael. I know there are other good quality brush companies out there but I found my winning horses and I'm sticking with them. Take care of these brushes by cleaning them regularly during the painting process and storing them in a place where the bristles won't be bent. As well make sure you get their brushes made for 'miniatures'. The reason is these brushes have a shorter and springier bristle which helps with fine detail painting. But I'll no doubt go into more dept about paint brushes on a later Talkin Tools segment.
Paint - Buy good quality acrylic. For miniatures you're looking at brands like Games Workshop(Citadel), P3 Paints, Vallejo. There are a couple other good paint suppliers out there for miniatures...but like I said before I've found my winning horses. These brands are known for their quality and range of colour. Recommend them. Just make sure you have a good selection of colours in your tool box.
PVA or Wood Glue - Simply put get some. You need it to base your miniatures.
I think that just about wraps it up. I keep remembering things that I use all the time but I kept trying to think back to things I used when I first got started and these are pretty much it. Hope that helps you out :)

Tuesday 20 September 2011
Shiny Disco Ball
Here's a photo of my Cygnar 'Disco Ball' Storm Strider...With such a large base it would be a travesty to just simply put gravel on the base and be done with it. It needed some charm, some character, something that helped tell a story about what was happening.
So you'll notice that I put a broken fence on the base...to suggest perhaps the Storm Strider crushed it underfoot while 'striding' around the place...either way its a cool little feature to help give your model some life.
Enjoy!!


So you'll notice that I put a broken fence on the base...to suggest perhaps the Storm Strider crushed it underfoot while 'striding' around the place...either way its a cool little feature to help give your model some life.
Enjoy!!


Monday 19 September 2011
eStryker and the lightning crew
At least that's what I've named them. Ive recently received a new commission to paint a small Cygnar force for one of my clients. Its a list focused around eStryker and such and I'm really glad that I get to paint this...why? Do I hear you ask? Because I myself am a big Cygnar fan at last estimate over a 100pts worth!!!
So here it is!!! The force semi-ish complete...there are still a few models to come from the client...
 What I love about painting for this client is he always gets me to do really cool bases. So for this project the theme is war torn battlefield which features sandbags, barb wire, and tank spikes. All very cool and I'm definitely looking forward to painting these guys.
Remember if you were thinking of getting something painted be sure to drop me an email at : min.of.paint@gmail.com or use the inquiry contact form to the right.
So here it is!!! The force semi-ish complete...there are still a few models to come from the client...

Remember if you were thinking of getting something painted be sure to drop me an email at : min.of.paint@gmail.com or use the inquiry contact form to the right.
Sunday 18 September 2011
Irresistible Force Warmachine League Week 1
So part of the reason we all love to have painted mini's is to play with painted mini's...that being said Irresistible Force has begun running an 8 week league for Warmachine in two divisions a 25/35pt and a 35/50pt. As it just so happens it all began this week. Here are a couple of photo's of me losing to Gav 'Slardy' Clarke in the 25pt division with my legion army...(note you can see the fully painted Angelus here...only just lol)


After something like 5-6 turns in the end Gav managed to clip eThagrosh to death with some stupid pikemen...not something I was expecting lol
As well in the 35/50 pt division I played a fine young gentleman by the name of Aaron Pyke...Aaron was up against it with my eHaley list which I've just discovered how to use Telekinesis (I'm such a muppet) Each turn I was able to pretty much turn a large portion of his force around to face the opposite direction as he was playing a beast heavy Troll army.
I didn't get any pics but must remind myself to take photos in the future...will probably try and get a picture or two up of my storm strider who has been able to succesfully die without doing any damage on 4 occasions now...YAY...
Saturday 17 September 2011
Blood BOWL!!!!
Last year I was introduced to blood bowl for the first time because I had someone contact me to paint a team for them. While I had seen the game on the shelf for sometime I had never been given the pleasure of being able to examine a team up close...Anyways last year and into this year I went a little blood bowl crazy and ended up painting, from memory, 6-7 teams for myself and other people.
Even now I still enjoy painting a good ol' blood bowl team.
Here's some photo's of the work that I've done...just wanted to share them with you all...
 This was the first ever blood bowl team I had ever painted and even now looking back I ask myself...how couldn't I get hooked? These awesome Gators were like a gateway drug into the world of Blood Bowl lol
 These guys are just really cool...how could you not love a great looking undead team...the big guys at the back I found immensely pleasurable to paint.
 Here is another one of the commissions I took in my Blood Bowl crazed flurry of painting...
 And finally I got to paint a team of my own...funnily enough I only played with this team 3 times before I moved onto playing a fully fledged Ogre team...
So that's all the photo's I can find of teams I've painted in the last twelve months even though I'm sure I've done more...
Oops turns out I have...here's a team painted up as the New Zealand 'All Blacks'

That is all...a big thanks goes out to all those who love blood bowl and love a good paint job. If you don't have the time or the skill to paint...why not shoot me an email on: min.of.paint@gmail.com and see if we can't work something out for you.
Even now I still enjoy painting a good ol' blood bowl team.
Here's some photo's of the work that I've done...just wanted to share them with you all...


So that's all the photo's I can find of teams I've painted in the last twelve months even though I'm sure I've done more...
Oops turns out I have...here's a team painted up as the New Zealand 'All Blacks'

That is all...a big thanks goes out to all those who love blood bowl and love a good paint job. If you don't have the time or the skill to paint...why not shoot me an email on: min.of.paint@gmail.com and see if we can't work something out for you.
Friday 16 September 2011
Legion of the Everblight Skin
Since getting an airbrush my life a both a commission painter and a hobbyist has gotten a lot easier. Jobs that would have taken me hours to do well can now be done in 20-30min...one example is this Angelis from the Privateer Press range 'Legion of the Everblight'
I've done here a step by step 'How to paint Legion of the Everblight Skin' tutorial.
As is seen in the first two photo's I've assembled the Angelus and undercoated it black.

 From here I started with a base coat of Shadow Grey. I like this grey because it is not a straight grey but has some blue in it which is fantastic for Legion of the Everblight.

 After the base coat I started adding in Spacewolves Grey to the Shadow grey in what was probably a 3:1 Shadow to Spacewolf combination.
I continued adding more spacewolves grey to the mix as you can see in the photo below. As well its probably worth noticing that I'm beginning highlight the model by only applying the lighter shades to the higher points i.e. the upper parts of each wing fold and the top of the neck.

And finally I finish off with straight spacewolves grey. Highlighting only the most extreme edges to give the model some really awesome contrast.

I've done here a step by step 'How to paint Legion of the Everblight Skin' tutorial.
As is seen in the first two photo's I've assembled the Angelus and undercoated it black.


I continued adding more spacewolves grey to the mix as you can see in the photo below. As well its probably worth noticing that I'm beginning highlight the model by only applying the lighter shades to the higher points i.e. the upper parts of each wing fold and the top of the neck.

And finally I finish off with straight spacewolves grey. Highlighting only the most extreme edges to give the model some really awesome contrast.

If you read this and liked it let me know by leaving a comment. As well if you'd like to see the finished model I'll be posting it up in a couple days.
As well remember if you'd like something painted don't hesitate to get into contact with us at: min.of.paint@gmail.com or use the link in the side bar to go to the inquiry form.
Thursday 15 September 2011
Eldar Titan Progress shots
As I recently posted. I've got on my painting table at the moment one big sucker of a model. The Forge World Reaver Titan. Spent a bit of time over the past few days doing some airbrushing all over the model and am about to settle in to paint the seemingly endless number of gems all over the model....
So while I go do that feel free to enjoy some of these pictures...


As always if you like what you see...LEAVE A COMMENT!!! If there is anything you want to know or if you'd like to see me paint something or do a tutorial then leave a comment.
So while I go do that feel free to enjoy some of these pictures...


As always if you like what you see...LEAVE A COMMENT!!! If there is anything you want to know or if you'd like to see me paint something or do a tutorial then leave a comment.
Wednesday 14 September 2011
Fancy Colours...
If you've ever painted your models with an airbrush then you will know how easy it is to achieve fantastic blending and shading on your miniatures...here is one such example...


 If you have any questions about how to do something similar be sure to pop a comment in the comment box.


Tuesday 13 September 2011
How to fill gaps on a miniature
Quite often in the miniature world we find that as we pull our miniatures out of the packet/box and start putting them together there are glaringly obvious gaps where two pieces are meant to meet. So what do we do?
GAP FILL!!!!!
Most gamers who have been around for awhile know about gap filling. And I know as a commission painter that especially on metal miniatures I find myself doing this a lot. So here is a simple 3 step guide to plugging the gap and making sure that (as best as possible) it doesn't show up once it's painted.
I've chosen this great example of a Privateer Press 'Raptor Cavalry' Model to demonstrate how this is done.
 This is a picture of the assembled model...notice the huge gap between the neck and the body...no amount of pushing it together was going to close this gap. So I got out my modeling putty and mixed up a small ball to gap fill this and 5 other models.
 Rolling out the putty into a snake like shape gently press it into the gap. Remember you don't need to fill the entire gap. Just enough so from the outside it looks good. So that's what I've done here...just enough to cover the visible gap...
 Finally I've taken a sculpting tool and created a similar texture to that of the surrounding fur. While obvious here in this photo you see when its painted that it hides the gap quite well.

So there you go! Quick and easy providing a great result. If you have any questions leave them in the comment box below
GAP FILL!!!!!
Most gamers who have been around for awhile know about gap filling. And I know as a commission painter that especially on metal miniatures I find myself doing this a lot. So here is a simple 3 step guide to plugging the gap and making sure that (as best as possible) it doesn't show up once it's painted.
I've chosen this great example of a Privateer Press 'Raptor Cavalry' Model to demonstrate how this is done.


So there you go! Quick and easy providing a great result. If you have any questions leave them in the comment box below
Monday 12 September 2011
Reminiscing
As I've just finished painting one of my many planned entries for Auscon next year. It led me to reminisce about some of the fantastic miniatures that were entered in the Wizards of Oz competition this year. I took some photo's on my iPhone just to give you a taste of what was there...


Hope you enjoyed having a look at these...if you're able be sure to get there for next year. Its a great weekend of gaming and all round gaming fun.
www.auscongames.com.au


Hope you enjoyed having a look at these...if you're able be sure to get there for next year. Its a great weekend of gaming and all round gaming fun.
www.auscongames.com.au
Subscribe to:
Posts (Atom)